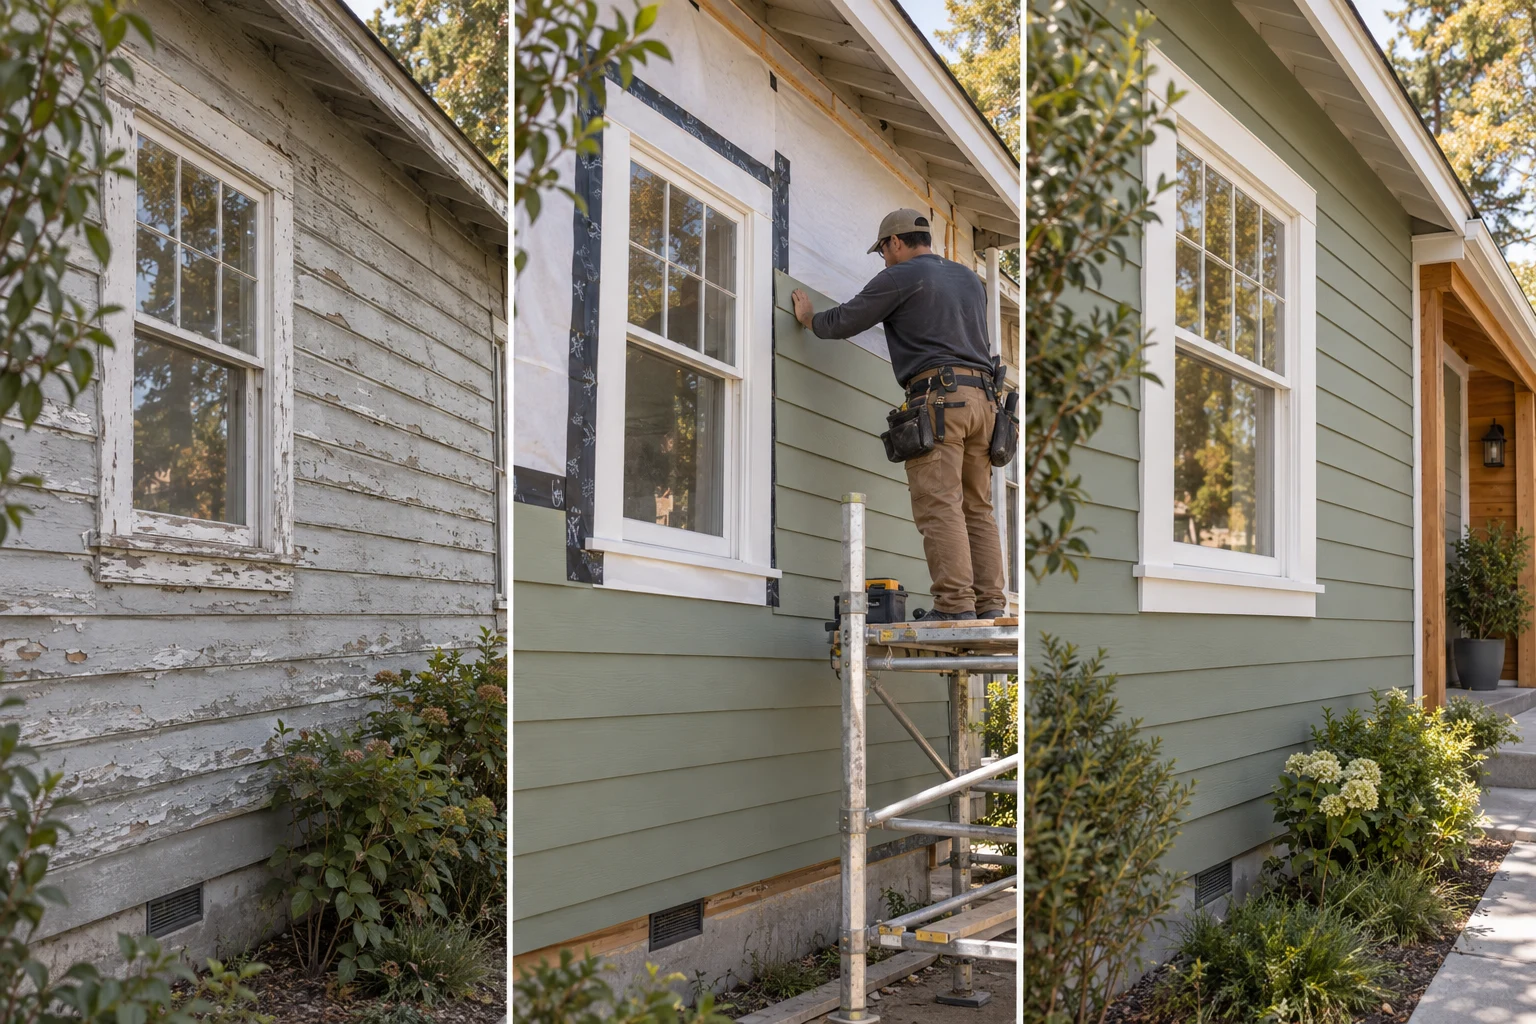
The siding replacement process follows a clear sequence: plan and approve the scope, remove the old siding, inspect and repair what's underneath, install a weather barrier and flashing, hang the new siding and trim, then paint and close out. Knowing what happens at each step helps you prepare the house, make decisions on time and understand what you are looking at when the walls are open.
Step 1: Scope, selections and permits
Before anything comes off the wall, the scope is set: which elevations, which product and profile, trim details, colors and how repairs will be handled. Selections that affect ordering, such as siding profile, trim size and finish, need to be approved early because some products have lead times. If a permit is required, drawings or product information are submitted to LADBS or your city building department, and fire-zone requirements are confirmed if the property is in a Fire Hazard Severity Zone.
Step 2: Prepare the site
The crew sets up access and protection. That can mean scaffolding or ladders, tarps over plants and paving, and protection for windows and roofs. You will usually be asked to move items away from the walls: patio furniture, potted plants, grills, bikes and anything hanging on exterior walls. Inside, take down pictures and shelves on exterior walls, since removal causes vibration.
- Clear a working strip along each wall being re-sided
- Move vehicles out of the driveway if it is the staging area
- Trim plants and shrubs that touch the walls
- Tell neighbors about noise and access on shared sides
- Arrange for pets to stay away from the work area
- Confirm where debris bins or trailers will be placed
Step 3: Removal and inspection of sheathing and WRB
Old siding is removed section by section, along with nails, damaged building paper and trim as scoped. This is the most important inspection point of the project. With the wall exposed, the crew looks at the sheathing, the existing weather-resistive barrier (WRB) and the framing, especially around windows, doors, roof intersections and the bottom of the wall where water tends to collect.
Soft or stained sheathing, rot, insect damage or gaps are photographed and reported to you. Repairs follow the process agreed in the estimate, with your approval before extra work proceeds. In pre-1978 homes, painted siding and trim may contain lead, and EPA rules require lead-safe work practices during removal. Ask to see the open walls so you understand what is being repaired.
Step 4: Weather barrier and flashing
Once the sheathing is sound, a new weather-resistive barrier is installed across the walls, lapped so water runs down and out rather than behind it. Flashing is then integrated at every vulnerable spot: window and door openings, roof-to-wall intersections, the base of the wall, and penetrations such as vents, pipes, hose bibs and light fixtures.
This layer is invisible once the siding goes on, yet it does most of the work of keeping water out. Ask your contractor to walk you around at this stage so you can see the barrier and flashing, and take your own photos for your records.
What you can do while the walls are open
Open walls create a short window for related work that is much harder later. Consider whether you want to add exterior outlets or lighting, relocate a hose bib, add blocking for future awnings or shutters, or seal gaps around pipes and vents. Tell your contractor early so these items can be priced and coordinated before the weather barrier is installed. Anything electrical should be handled by a licensed electrician and included in the permit where required.
Step 5: Install siding and trim
Siding goes on according to the manufacturer's instructions, which specify fastening, spacing, clearances from the ground and roof, and how joints are handled. Starter strips, corner treatment and trim at windows, doors and fascia are installed as part of the system. Gaps and joints are sealed where the product requires it.
This is also when you see the design come together: board exposure, shadow lines, corner details and the relationship between siding and window trim. If something looks different from what you expected, raise it early rather than at the end.
Step 6: Paint, finishing and reinstallation
Primed siding and trim are caulked and painted as specified, typically with two finish coats. Factory-finished products may only need touch-up. Gutters, downspouts, light fixtures, house numbers, hose reels and anything else removed from the walls are reinstalled. Paint timing can depend on weather, and coatings have temperature and humidity limits listed by the manufacturer.
Throughout the project, keep a simple log of what you see: photos of open walls, notes on repairs you approved and the dates of inspections. It becomes a useful record for future maintenance or a home sale.
Step 7: Final walkthrough and records
Walk around every included wall with the project lead. Check corners, window and door trim, caulk lines, paint coverage and reinstalled items. Note any touch-ups on a punch list. Collect the product names, colors, paint information and care instructions for your home records. If a permit was issued, confirm the final inspection has been completed and signed off.
Next step: plan your siding project
Send photos of each side of the house, the number of stories and any areas of known damage or leaks. Tell us the home's approximate age and whether windows are being replaced. We will review the walls, explain how each step applies to your house and prepare a clear scope. Call Chain Construction at (213) 519-8066.