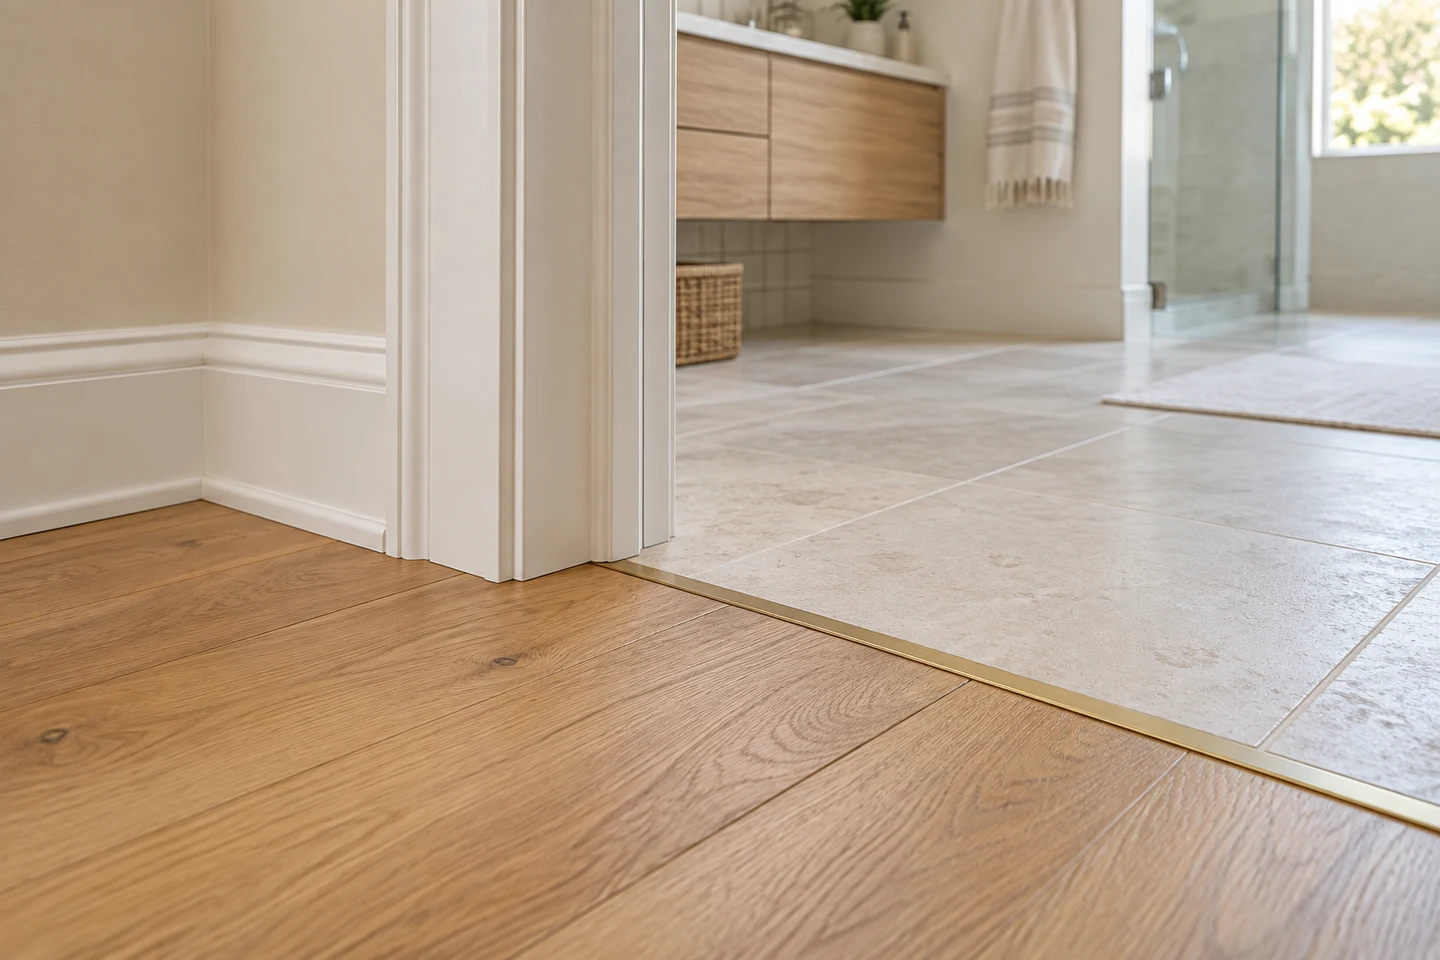
A new floor looks finished only when the edges do. Planning wood flooring and baseboards together, along with the transitions at every doorway, avoids the most common disappointments: gaps under old trim, awkward height changes at the bathroom, doors that no longer swing, and shoe molding added as an afterthought. This guide walks through the decisions that turn a floor into a complete room finish.
Map the rooms and floor heights first
Start with a simple floor plan, even a hand sketch, showing every room getting new flooring and every room it meets. At each doorway, note what's on the other side: tile, carpet, existing hardwood, vinyl or an exterior threshold.
Then think about height. A traditional solid hardwood floor is noticeably thicker than many engineered products, and either can sit higher or lower than the tile next to it. The difference determines what kind of transition you'll need, whether doors must be trimmed, and whether appliances like a dishwasher still slide out under the counter. Knowing the finished height of each surface early is the single most useful planning step.
- Rooms included and the rooms they connect to
- Existing floor material and approximate height at each doorway
- Exterior doors, sliders and their thresholds
- Stairs, landings and step-downs
- Appliances under counters and built-in cabinets
- Floor vents and registers
Choose material and layout for the whole flow
Decide whether the floor runs continuously through connected rooms or changes at certain doorways. A single material and direction through a living room, hallway and bedrooms makes a home feel larger and avoids a row of thresholds. A deliberate change, such as herringbone in the living room and straight planks in the bedrooms, can work too, as long as the transition is planned rather than improvised.
Board direction usually follows the longest wall or the main line of sight from the entry. On a raised foundation, installers often run nail-down boards across the floor joists for stiffness. Species, width and finish should be chosen with samples in your own light. For the choice between product types, see our comparison of engineered and solid hardwood.
Plan transitions at doorways and height changes
Where two floors meet, you have a few options. A flush transition, with both floors at the same height, is the cleanest but requires planning the subfloor so the heights match. A T-molding bridges two floors at similar heights. A reducer slopes down from a higher wood floor to a lower one. A threshold or end molding finishes against a sliding door, fireplace hearth or tile that sits higher.
Match the transition piece to the flooring species and finish, and decide where it sits: usually centered under the closed door, so neither room sees the other's floor. At exterior doors, the threshold and weather seal must still work after the new floor goes in. On stairs, plan nosings and treads alongside the main floor so color and profile match.
Wood flooring and baseboards: keep, remove or replace the trim
Wood floors need a small expansion gap at the walls, which baseboards hide. That's why the baseboard decision belongs in the flooring plan. You have three main paths.
- Remove and reinstall existing baseboards: keeps the look, but older trim can split
- Replace baseboards: the best moment to change height and profile
- Leave baseboards and add shoe molding: faster, but reads as an add-on
If you're replacing, choose height in proportion to the ceiling. Taller baseboards suit higher ceilings and larger rooms; a slimmer profile suits compact spaces and modern interiors. Match the style to door casings. Paint-grade trim is typically the choice for painted baseboards, while stain-grade wood is needed if you want to match the floor or cabinetry.
New baseboards need to be caulked, filled and painted, and walls behind old trim may need patching where the previous profile was taller or shaped differently. Include that work in the scope so the final edge is clean.
Older Los Angeles homes add a few wrinkles. Plaster walls may be wavy, so a stiff new baseboard can leave gaps that need scribing or caulk. Original trim with a distinctive profile may be worth saving and reinstalling, even if it takes more care to remove. And floors in older houses are rarely perfectly level, which a new baseboard line will reveal unless the subfloor is corrected first.
Don't forget doors, vents and fixed items
A higher floor can stop interior doors from clearing, so plan to trim doors where needed. Floor registers need to fit flush with the new surface; older metal registers may not match a new finish. Toilets, built-in cabinets, kitchen islands and fireplace hearths all create edges that need a decision: does the floor run under, around or up to them?
For kitchens, check whether the new floor will run under the dishwasher and range, and confirm the appliances can still be removed later without damaging the floor or countertop.
Get the sequence right
A typical sequence is: remove furniture, old flooring and baseboards; prepare and test the subfloor; acclimate the flooring as the manufacturer directs; install the floor; add transitions and stair parts; install baseboards; then caulk, fill and paint trim with the floor protected. Painting walls before the floor goes in and touching up after is common. Keep a small amount of leftover flooring for future repairs.
What we need from you to quote it
- A floor plan or sketch with approximate room dimensions
- Photos of each room and each doorway, showing the adjoining floors
- Current flooring and whether it needs to be removed
- Your preferred material, pattern and samples, if you have them
- Baseboard plan: keep, reinstall or replace, and preferred profile
- Property location, foundation type if known, and preferred timing